- On page TOP
Image enhancing and tagging options in Linux
This was written a few years back, so there might be some inaccuracies now as I haven't used any of these app's since.
| Application | Pro's | Con's |
| gwenview |
|
|
digikam 2.6 |
|
Albums
Batch
|
| showfoto |
|
|
| gthumb |
|
|
| F-spot |
|
|
| shotwell 0.14 www.yorba.org/... |
|
|
| darktable |
|
|
| kphotoalbum |
|
|
| XnView MP 6.9 xnview.com.. |
|
|
Using Digikam
My Digikam Assigned Shortcuts
(can also add toolbar buttons)
| V | View Image - for ease of opening and returning to thumbnails | Alt-A | Invert selection | In Edit |
|
| M | Maps | 2 | Forward (browser style) | T | Show/hide the thumbbar |
| T | Thumbnails | 1 | Backward | 1 | Brightness/contrast |
| C |
or Space or Shift-scroll button =next image |
F1 | Export to Picasa Web Albums | 2 | Hue/saturation |
| Z |
or Shift-Space =Previous image | F2 | Geo-location tool | Ctrl-X | Crop to selection |
| > | Zoom in | F3, N | Rename | Esc | closes the tool panel |
| < | Zoom out | F | Fullscreen toggle | F4 | closes edit window |
| A | Open Albums on left panel | Q | Add to current queue | ||
| G | Open Tags on left panel | W | Add to new queue | Light table | |
| L | Open image on Light table | Ctrl-Q | Open batch queue manager | L | close the window |
| S | gpS, open image(s) in Geolocation tool |
- Click album title bar = Select all / Click off the thumbnails = Deselect all
- Click image, shift and arrows to select multiple images
- F4 opens image editor
- F5 jumps to top of album
- F9 is slideshow
- home/end -first/last image, pg up/pg dn -moves up/down the thumbs
- Edit window "Forward/Backward" shortcuts are for next/previous! Light table has next/previous shortcuts (Ctrl-M for menu).
- Geolocation window closes with Escape.
Select pics across multiple albums
- easy as selecting images and assigning a "color label" to them (keep at least one color for temporary use) or a star
- do this for images in different albums that you want to select together
- then use the filter on the right bar to show only the images you just labeled (you will need to check View > Group Images > Flat list)
- then select them all (click on the title bar) and do as you wish -tag, send to a queue, export to we album etc
- alternatively, add images from different albums to a single queue -but what if you want to add them all to another queue, or start over again?
Tips
- Add Views icon to toolbar -use it to select how an album with child albums shows thumbnails, divided at albums or a flat list (all images together alphabetically)
- Add "1 Star" and "No Star" buttons (can rename the text on them) to the toolbar -or whatever color labels you like.
- Group thumbnails: drag an image thumbnail onto another one to group them together (or select multiple and right click >Group >group here), click the group icon on the top one to show them, click again to hide, right click 'ungroup' them -this is a way to group images in an album of the same view or place for example.
- add the Maintenance icon to the toolbar -use for scanning new images to the albums.
- edit images with "Enable non-destructive editing and versioning" checked in Configure so that originals will be kept.
- add the thumbnails button to edit/light table windows.
- in edit window add the Select Tool button for a quick tool selection drop-down.
Geo-Tagging
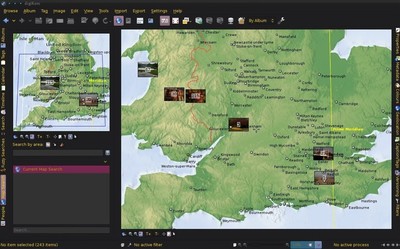
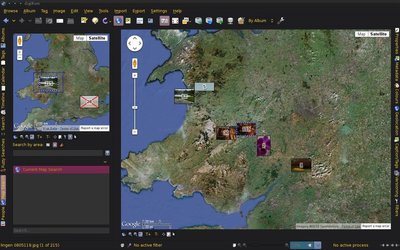
1. Geo-location filter at left pane, shows a map integrated with either kde's marble (world globe) or with G maps shows groups of geotagged images on a map with count of images,
- group divides into smaller groups as you zoom in
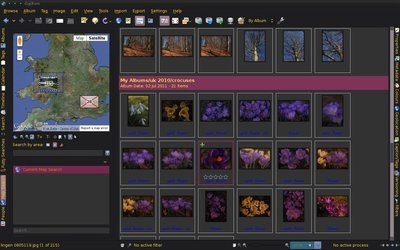
- click on a group and its images' thumbnails are shown in centre pane
- >>rectangle select: click-drag area to select multiple groups
- images can be sorted youngest/oldest shown first
2. Geo-location in center pane: again a marble map globe or G maps, which shows geo-tagged images from the database in groups with image count
- images shown on map will reflect what is filtered in the left pane
3. Geo-tagging window shows two maps which can move around separately, you just drag images to the map to geo-tag them.
- select images from an album before opening the geo-tagging tool
 |
 |
 |
Image conversion
Method 1. select an album -directory- and RC >Batch Process >Image Effects/ Recompress (no format conversion)/Resize
Method 2. select images (click on album header to select all) and add to a queue (Configure toolbar with the queue buttons or shorcut key, i.e. Q, for ease)
- drag a Batch tool into the Assigned tools box, adjust the tool, choose whether to overwrite files or make a new album, and Run it
- other images can be added to another queue before a process has finished
Example: convert stills from HD video for showing/uploading (6Mb .png files in /Pictures/../NEW)
- select PNG files and add to a queue and convert to jpeg's
- then filter the album by mime type (PNG) and delete the PNG files (if necessary)
- select all and batch rename, press F2, and thus "original" JPEG's are created
- next, carry out any light enhancements, cropping, and/or just tagging and save changes to file
- select all the images and add to a queue, select resize, 1200-1400 pix 85-90%, make a new album
- once the images have been processed, the new album can be dragged over to the right directory in the collection
- the album of "original" images can be backed up to removable media
Digikam Wiki page kde.org/Digikam
Digikam Handbook http://docs.kde.org/development/...
Digikam automatically updates the "My Tags" list with any tags found in new images' IPTC data.
Whilst that is very handy, what if you save pics from the web which are full of useless tags? It will be tiring to delete all the tags you don't need from those web pics and your Tags list (one by one!). So I wouldn't save web pics into a Collection album. Save them elsewhere, then you can remove all their tags before moving to an album.
Remove metadata with Imagemagick:
- make a Thunar custom action or Ranger key with, for just the iptc data (keywords etc.): ls | xargs mogrify +profile iptc
- for applying only to the selected files use mogrify +profile iptc %F
- To remove ALL exif data (including datetimeoriginal etc) : ls | xargs mogrify -strip
Warning! the ls function will apply the command to all files in the directory! - Use instead for selected files: mogrify -strip %F
- there's also jhead, with the command to remove iptc (keywords) and xmp (subject) data: ls | xargs jhead -di -dx
- or do jhead -di -dx %F
Patches
- change album sorting to date https://bugs.kde.org/..
dump picasa and windows files from photo directories!!!
warning: all Picasa directory specific files will be permanently lost!
Image conversion with mogrify (Imagemagick)
Here are mainly Thunar right-click actions - all of these, if usable, are rewritten for Ranger (see my Ranger key mapping).- Edit >Configure custom actions >click + to make a new action, name it "convert all png to jpeg", with this next line as the command:
- mogrify -format jpg -quality 100 *.png
- in Appearance Conditions (for Thunar), enter *.png;*.PNG, and check "Image files"
Resize JPEGs for quick-viewing or uploading tasks
- mogrify -resize '1200x1200>' -quality 90 *.jpg *.JPG
- for a Thunar action, "resize all jpegs 1200p 90%", make conditions *.JPG;*.jpg;*.jpeg;*.JPEG
WARNING! this command will OVER-WRITE the image files so it's better done on copies of the originals put in a different directory too!
Or just copy the directories to another location to work in them. 1200x1200 ensures the max width OR height will be 1200pix. Just stating 1200 could leave you with some 1200 wide x1700 high images, for example.
If you need a custom action that can deal with only the selected files (and OVER-WRITES them), you can use something like:
- mogrify -resize '800x800>' -quality 96 %F
Let's do one that produces files with a suffix to the filename (it doesn't over-write them):
- mogrify -resize '800x800>' -quality 96 -format "jpg_1" %F
And how about with in infix, which will produce a new file "image_name.sm.jpg", like this
- mogrify -resize '800x800>' -quality 96 -format "sm.jpg" %F
OK, here's something good. This is a mogrify command that will convert all images in a directory (you can make it selection-only too with %F {for Thunar, but %s for Ranger} on the end instead of file extensions) and put them into a new directory that hasn't yet been created (that I've named "reduced"). (check images and enter *.jpg;*JPG in appearance conditions)
- mkdir reduced && mogrify -path reduced -resize '1200x1200>' -quality 90 *.jpg *.JPG
Or you can make a command so that all images in the directory which you click on will be size-reduced and put in a new directory alongside the one you clicked, with something like, (check "directories" in appearance conditions)
- mkdir %f_a && mogrify -path %f_a -resize '1200x1200>' -quality 96 /%f/*{.jpg|.JPG}
Feel free to alter the new directory suffix (mine above is "_a" -it could be "_resized") and of course the mogrify arguments.
This one scans recursivley and resizes all the jpeg's in the sub-dir's of the dir your right click on, and puts them into new sub-directories -which means just two clicks (and potentially a long wait!) to produce small images from, say, a stack of original large images. (watch the cpu monitor to know when the mogrify process is finished)
- for D in %f/* ; do mkdir "${D}"_a && mogrify -path "${D}"_a -resize '1200x1200>' -quality 95 "${D}"/*.{jpg,JPG}; done
or
- find %f/ -mindepth 1 -type d | xargs -n1 -I {} bash -c 'mkdir "{}_a" && mogrify -path "{}_a" -resize '1200x1200\>' -quality 95 "{}/"*.{jpg,JPG}'
or, if you are in a dir of files, this one will reduce all the images and put them in a new dir alongside it:
- mkdir "../%d_a"; mogrify -path "../%d_a" -resize '1200x1200>' -quality 90 *.jpg *.JPG
To do the above but to reduce the size of images in the directory, while overwriting the images, use this and click on the directory
- mogrify -resize 1024x1024 -quality 84 %f/*.{jpg,JPG}
And to do that recursively, so as to resize all the images in however many sub-directories there may be (which is quite useful)
- find %f/ -type f -name "*.jpg" -o -name "*.JPG" -print0 | xargs -0 mogrify -resize '1024x1024>' -quality 84 {} \;